how to draw a 3d camera
A camera is an optical instrument used for capturing visual images and videos. With the aid of a camera lens, it can accept all the light rays billowy in different directions and uses glass to redirect them to a single point, thus recording an epitome or a video.
Because of the photographic camera'south astonishing features and the science backside it, information technology is undoubtedly a very fascinating object.
This is as well the reason why a camera is interesting to draw, resulting in a high demand for a free camera cartoon tutorial.
To meet our reader'due south demands, we have created a step-by-pace tutorial on how to describe a photographic camera, made easier with 9 quick steps and uncomplicated illustrations.
What'due south fun most this tutorial is that it gives you consummate liberty to customize your drawing, allowing you to further hone your creative skills.
Utilise your creativity and imagination to create an extraordinary camera!
What's in this Blog Post
- How to Draw a Camera — Let's get started!
- Footstep 1
- Stride ii — Create an Outline of the Camera'due south Shape
- Footstep 3 — Afterward, Describe the Lens of the Photographic camera
- Footstep iv — Next, Depict the Flash of the Camera
- Step 5 — Then, Draw the Shutter of the Camera
- Step 6 — Afterwards, Describe the Camera's Mode Dial
- Stride 7 — Add together Details on the Flash of the Camera
- Step 8 — Add Pattern on the Body of the Photographic camera
- Step 9 — At present, Pattern and Style the Camera
- Your Photographic camera Drawing is Complete!
How to Draw a Camera — Let'southward get started!
Step 1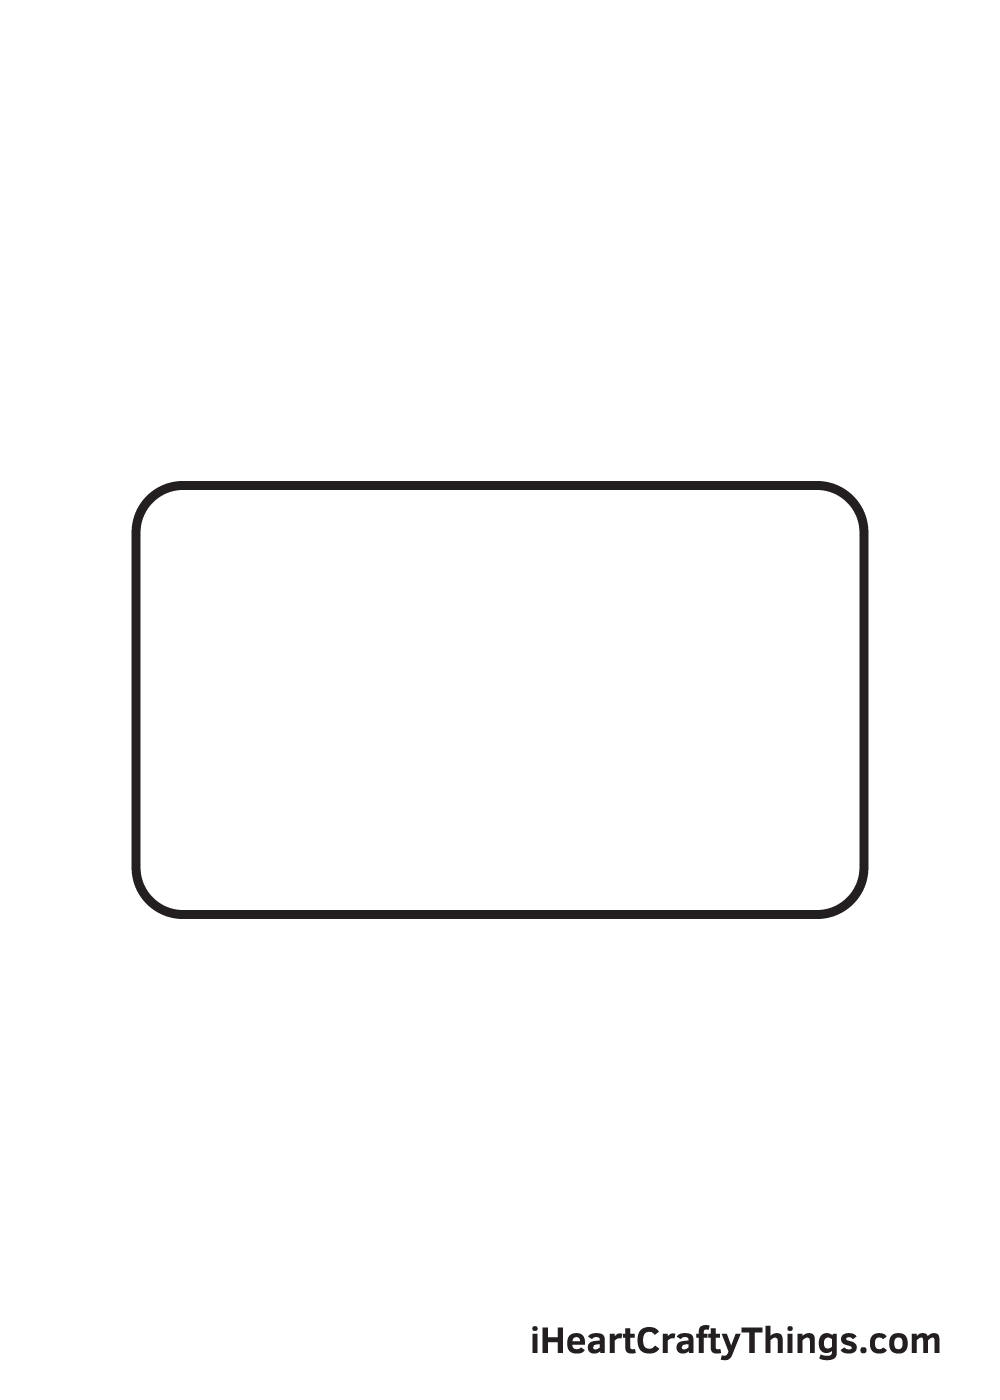
Start by drawing a rectangle with curved edges in the middle of your paper. This forms the outline of the torso of the photographic camera.
The shape of a photographic camera primarily consists of straight lines, thus you may need to utilize a ruler when drawing a camera.
Brand certain that the camera will exist drawn in the center by creating reference lines by drawing an intersecting horizontal and vertical line across your paper.
These lines serve as a guideline to assistance y'all determine where to position your drawing.
Step ii — Create an Outline of the Camera's Shape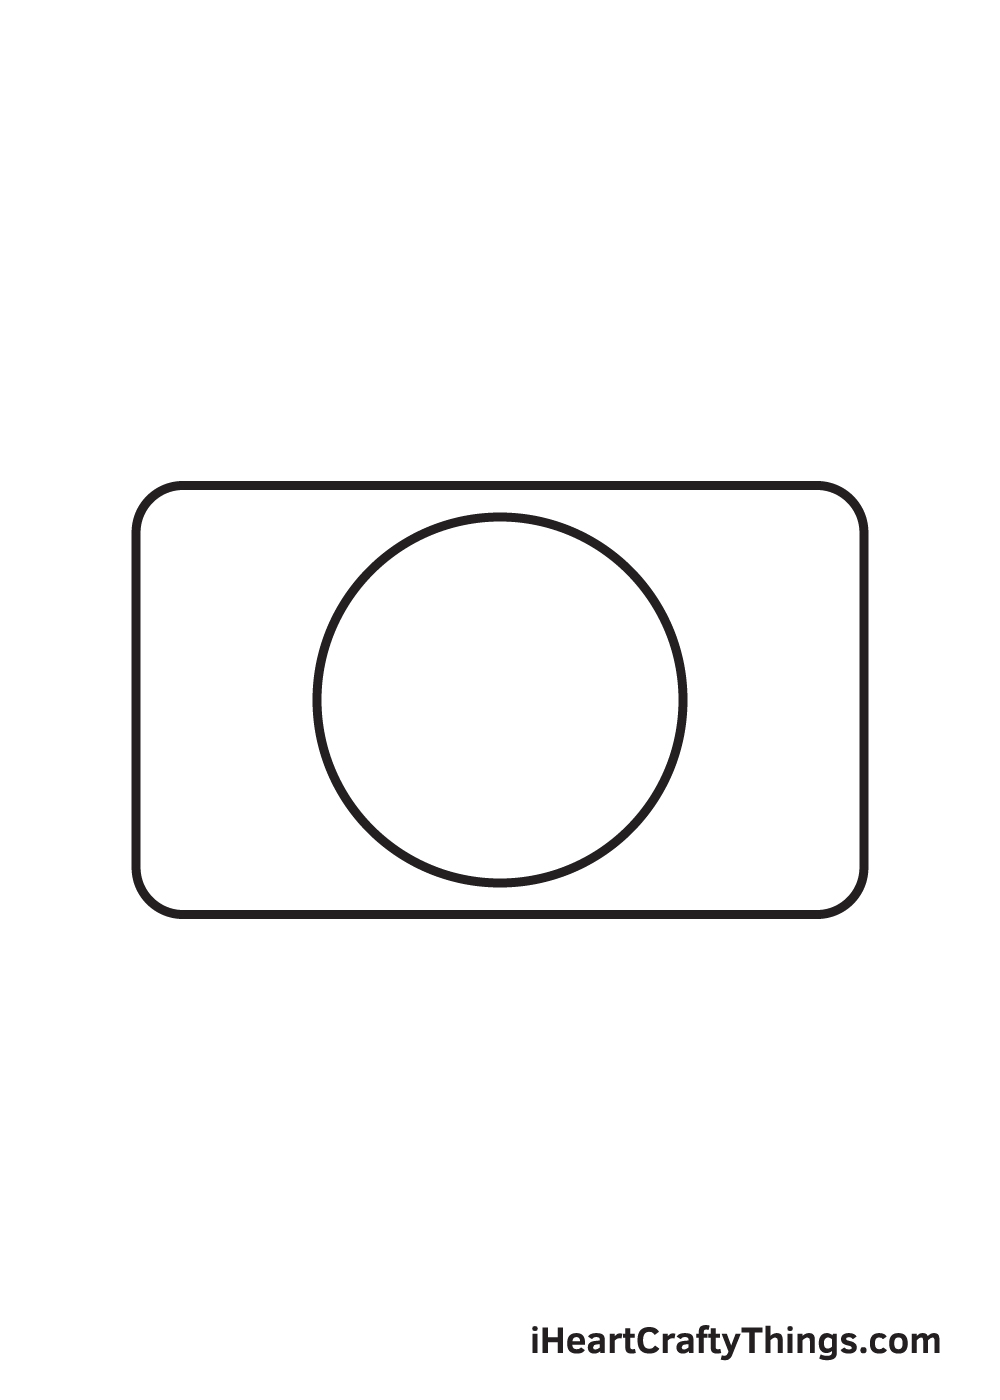
Describe a perfect circle in the middle inside the rectangle that we drew in the previous step. This forms the camera's lens.
If you tin't freehand a perfect circumvolve, don't worry! You tin can always use a compass, which is a drawing tool that assists yous in cartoon a circle shape flawlessly and easily.
Step three — Afterwards, Draw the Lens of the Camera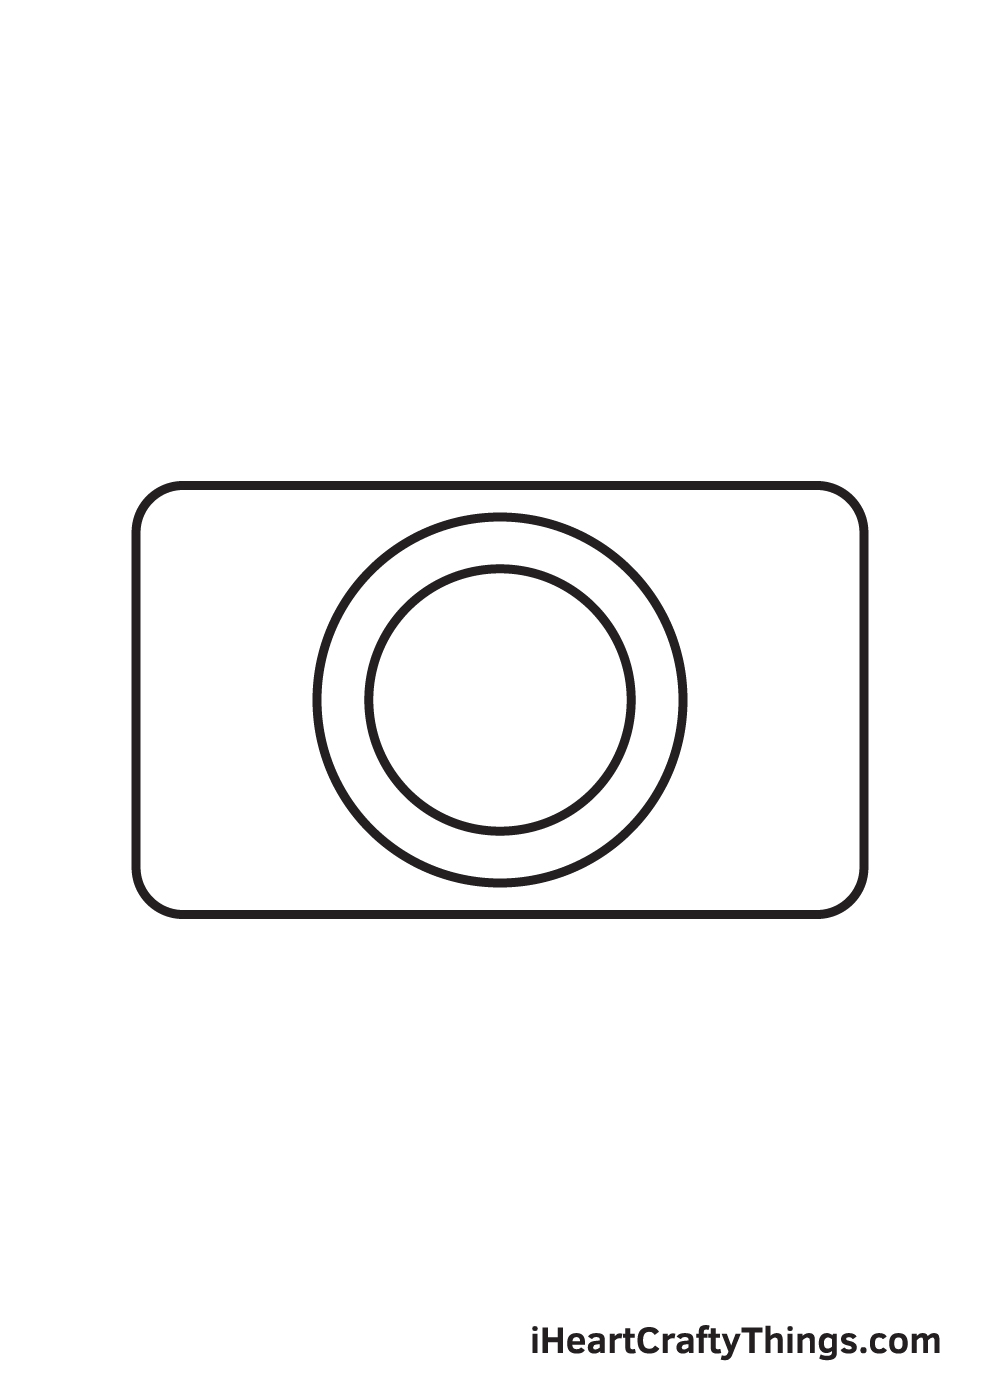
Within the circumvolve shape that we drew previously, draw a smaller circle. Make sure that in that location is a slight gap between the two circumvolve shapes, equally shown in the illustration.
After finishing this stride, the lens of the camera should now be complete.
Step 4 — Next, Draw the Flash of the Camera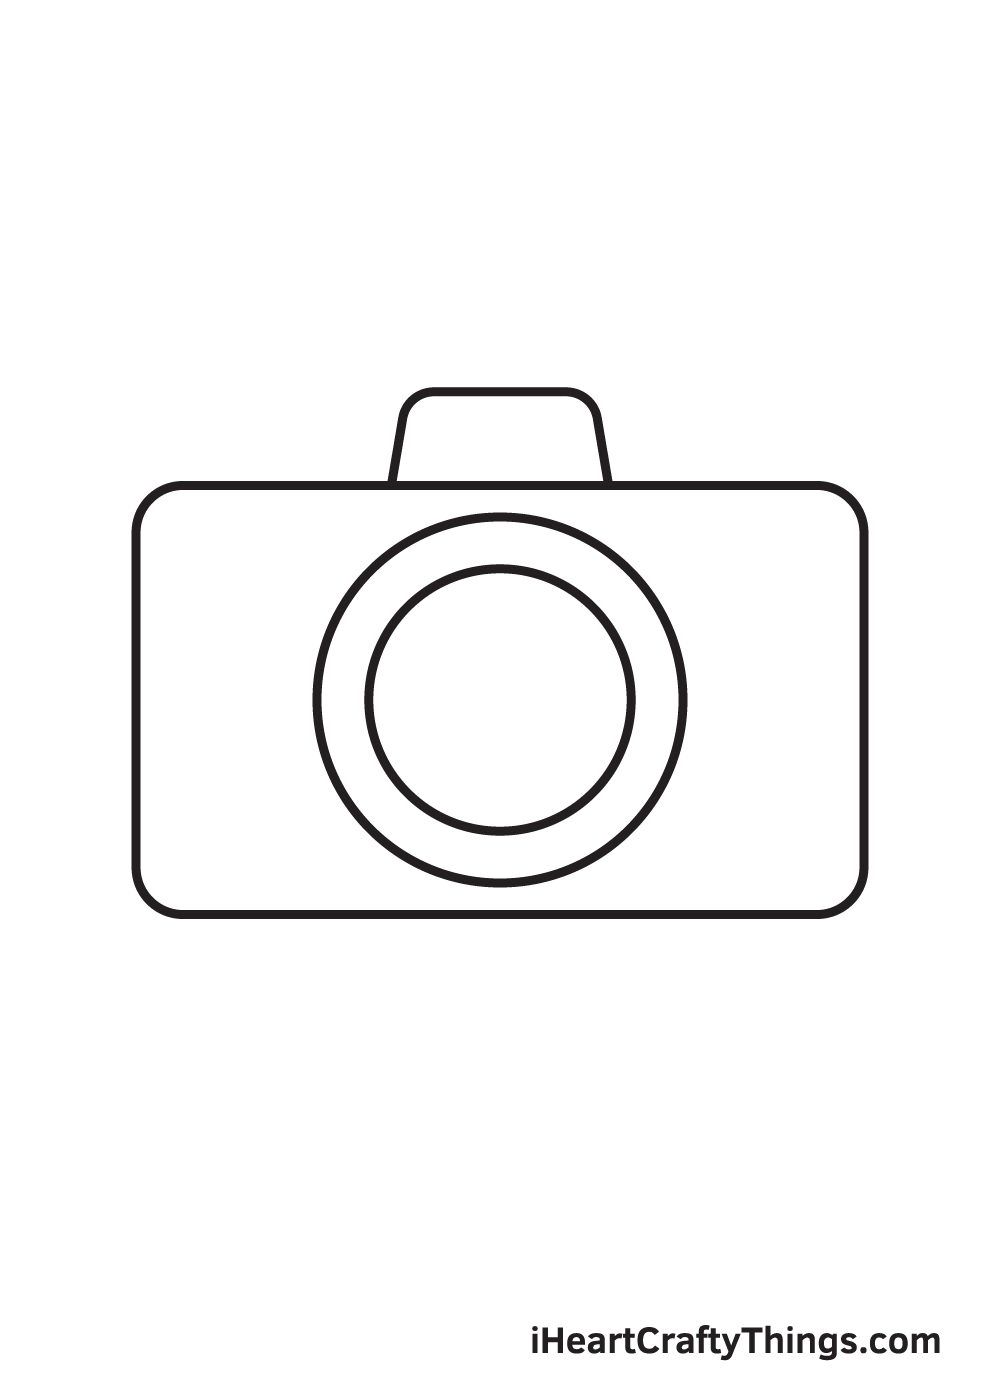
Depict the upper one-half of a trapezoid shape at the top middle of the photographic camera's trunk. This creates the flash of the photographic camera.
The purpose of a camera's wink is to illuminate a dark scenery, commonly at dark. However, it can too exist used to capture objects moving at loftier speed or irresolute the quality of light.
Step 5 — Then, Draw the Shutter of the Camera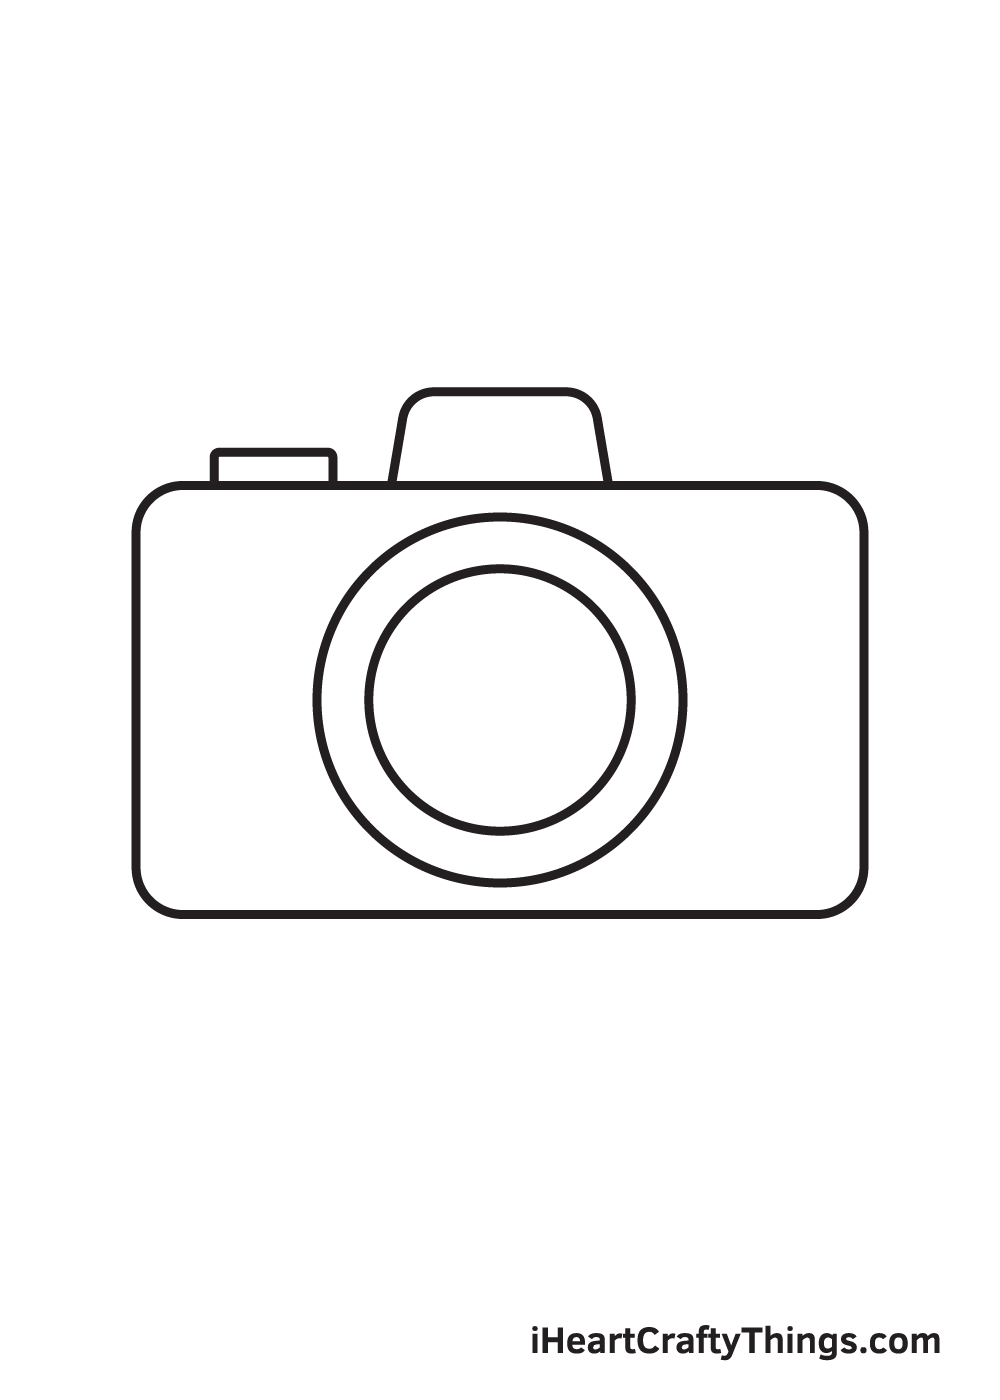
Draw the upper half of a rectangle shape at the elevation of the camera'due south body. Make certain that this shape will be drawn on the left side of the flash that we drew in the previous step.
This creates the camera's shutter, which is what the user will click to capture an image or shoot a video.
Footstep 6 — Afterwards, Describe the Camera's Mode Dial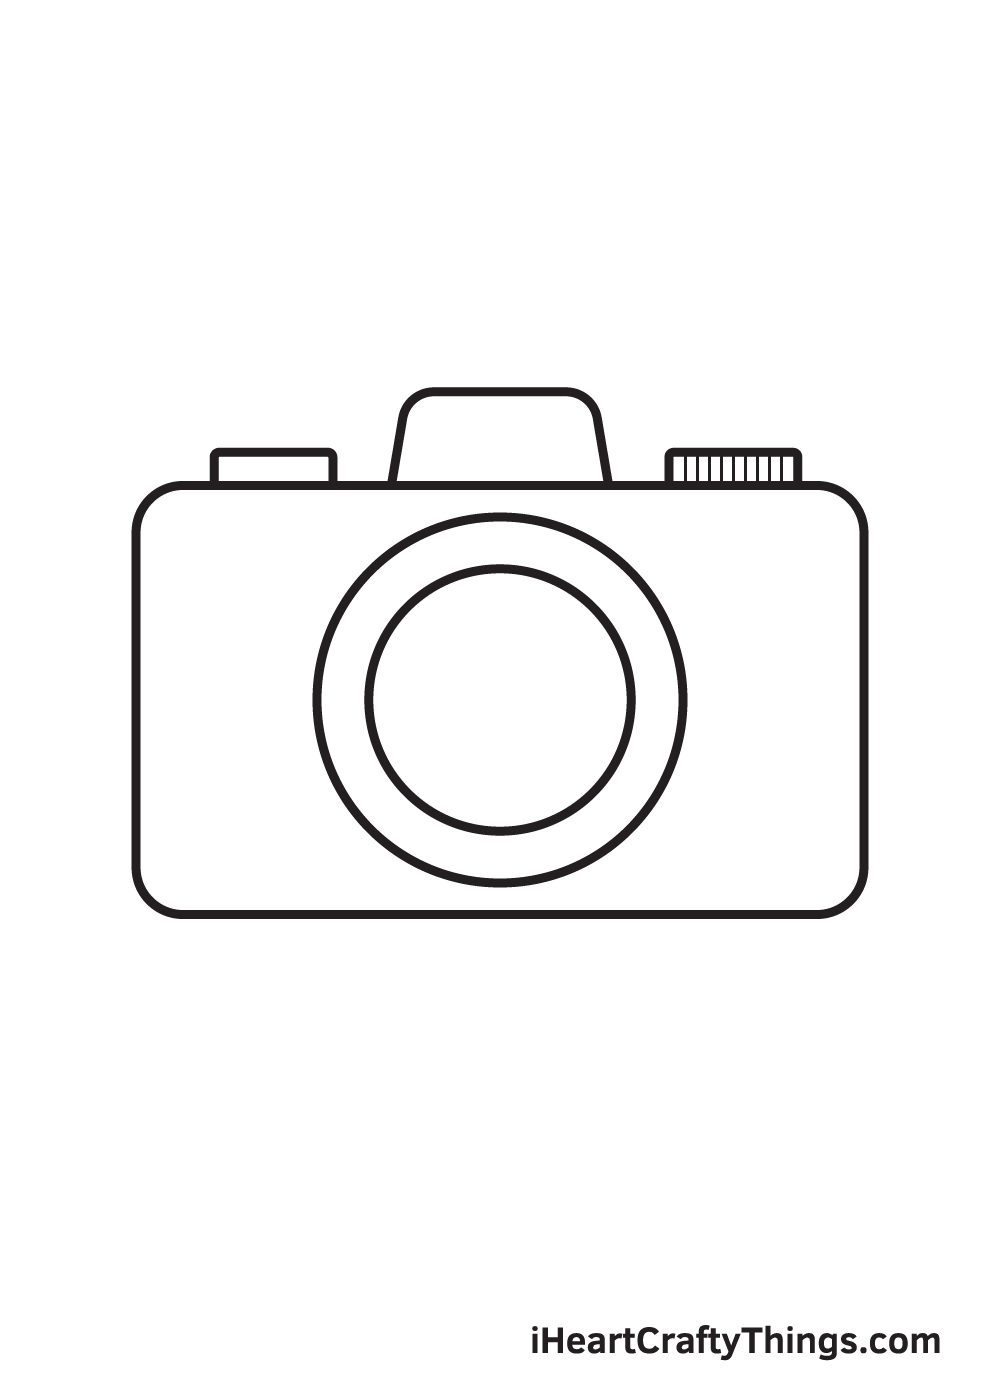
Repeat the previous step on the contrary side of the flash to create the way dial.
Afterwards, draw multiple brusque vertical shapes across the figure to add the details of the way dial.
Step 7 — Add Details on the Wink of the Photographic camera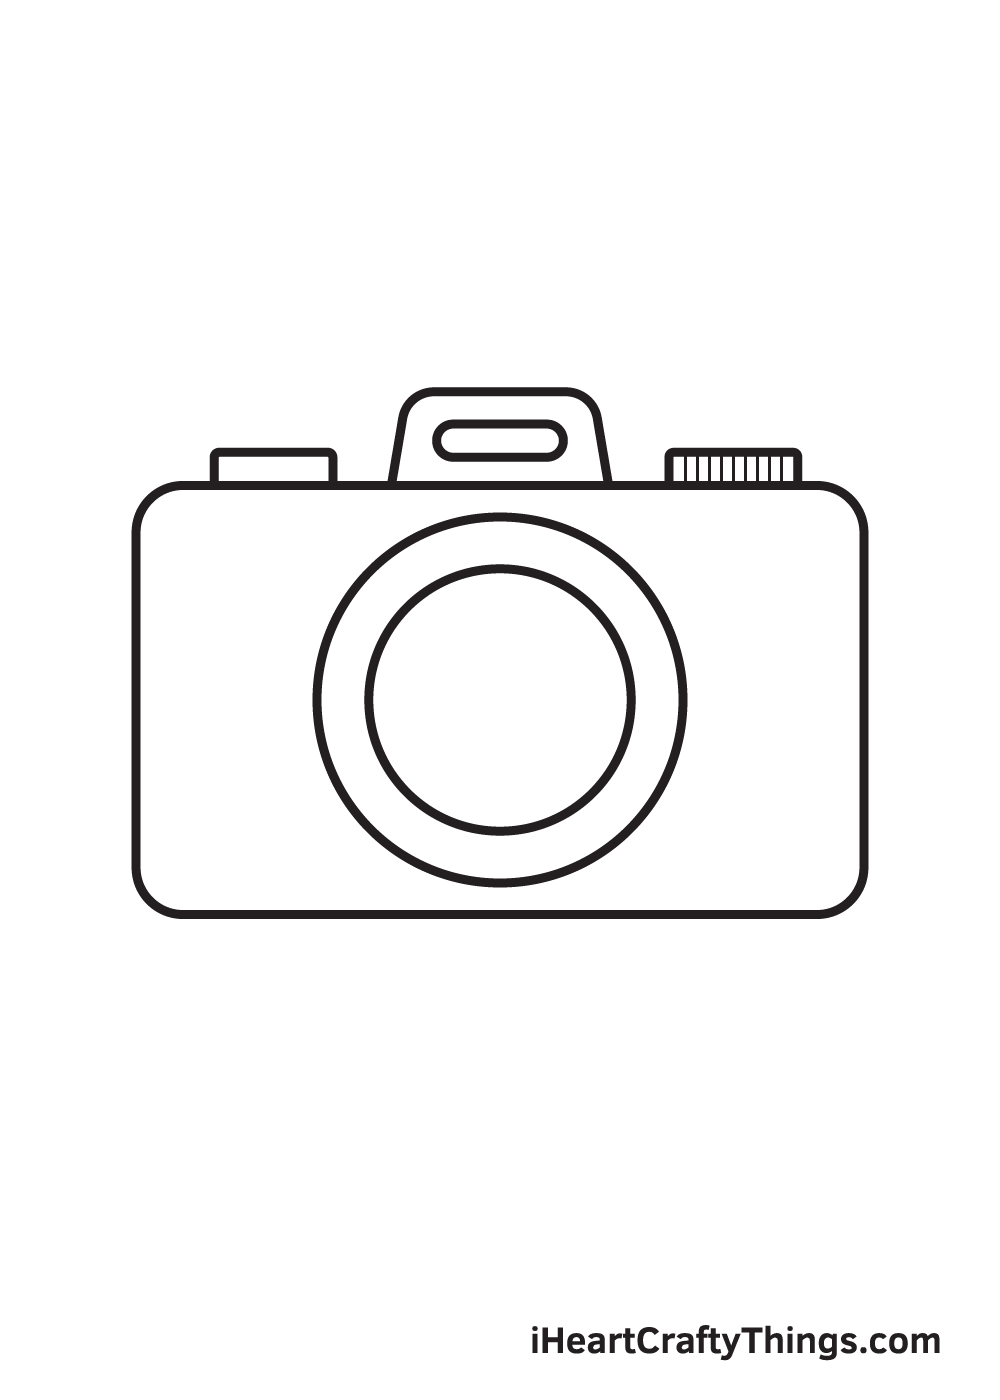
Depict an elongated sideways oval shape inside the flash, which we drew previously in the fourth step.
Step 8 — Add Pattern on the Body of the Camera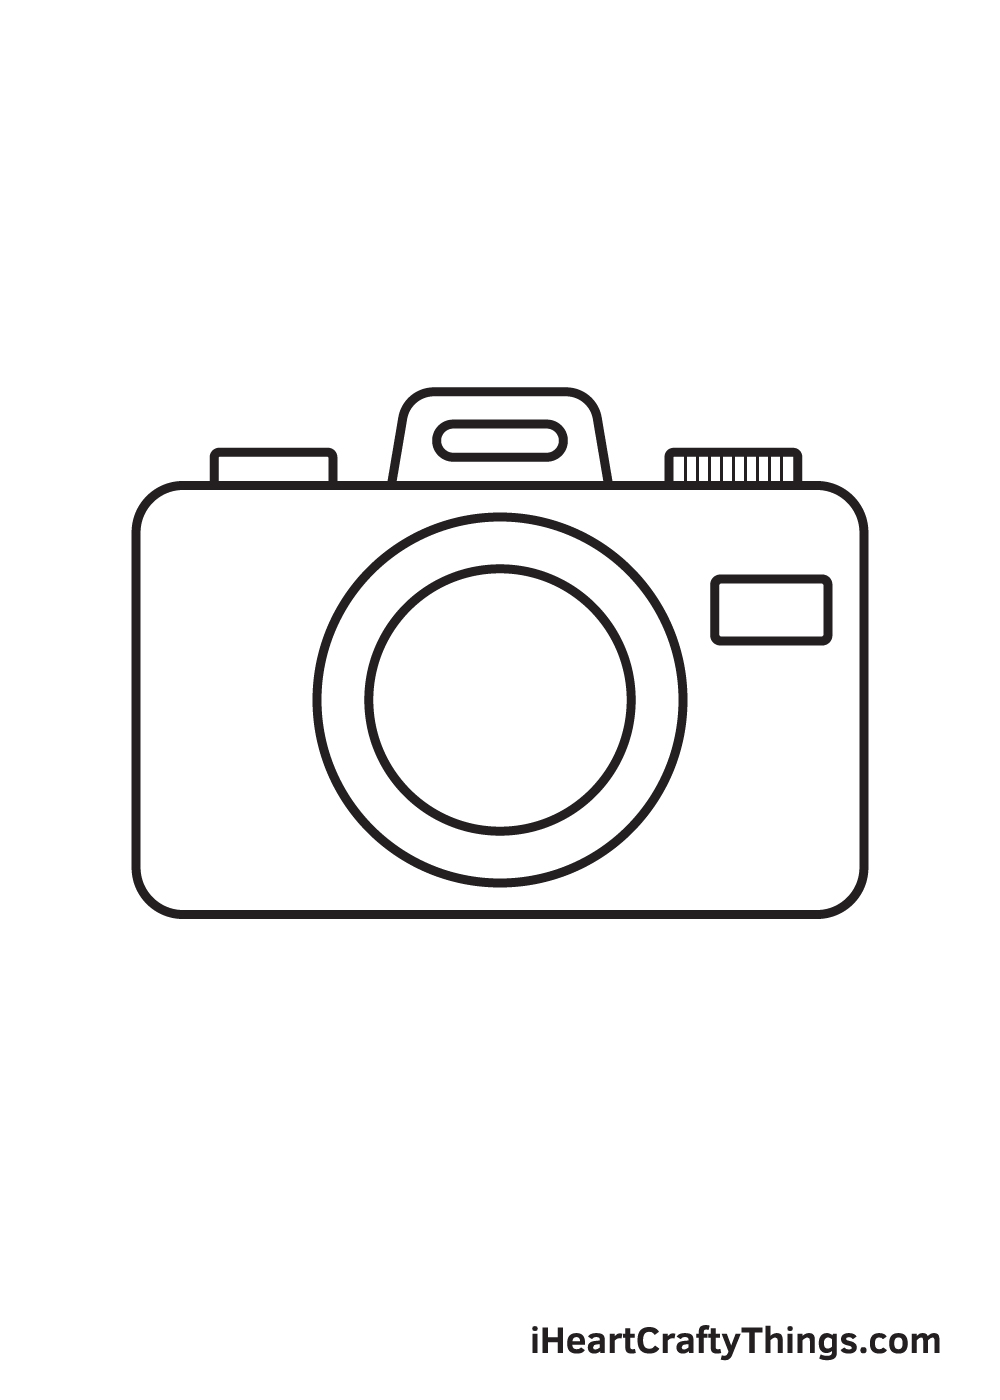
Depict a modest rectangle shape on the upper right side of the body of the photographic camera.
After completing this step, the essential parts of the camera should be complete. All information technology's missing are the design on the body of the camera.
Pace 9 — Now, Design and Style the Photographic camera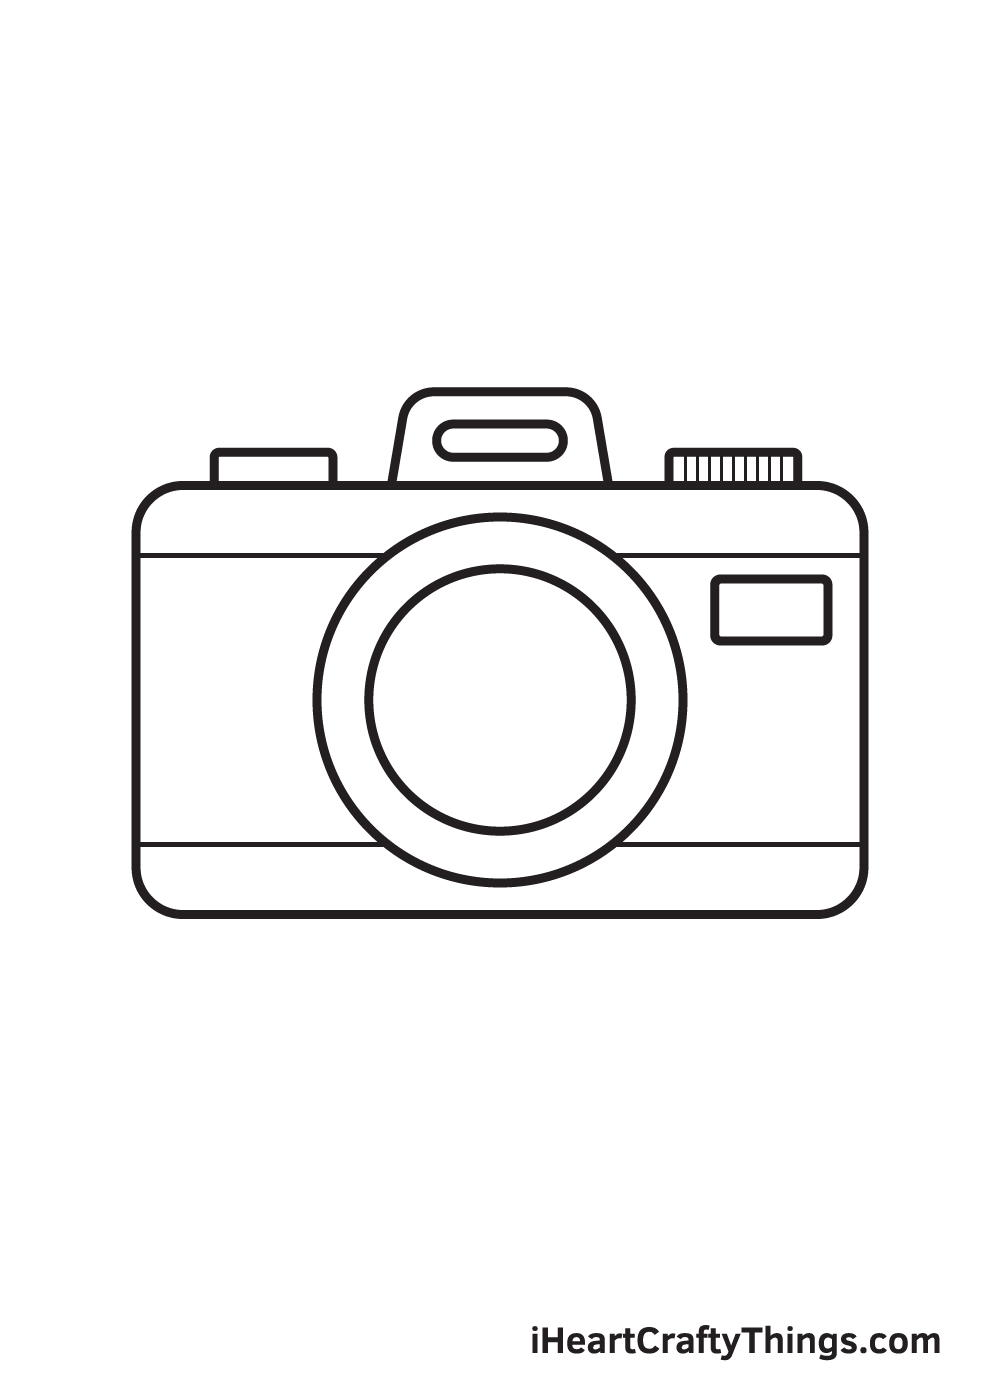
Draw a horizontal line across the meridian and bottom part of the body of the camera. This adds an aesthetic design on the camera's appearance.
As you lot can see in the illustration, we kept the pattern of the camera pretty elementary. Nevertheless, feel free to add whatever artistic patterns you lot like to design and way the camera!
Now that we've successfully drawn a photographic camera, it's finally time for the most exciting role, which is coloring your cartoon!
This last footstep is optional, but nosotros strongly recommend coloring your drawing to make your artwork vibrant and colorful.
Though cameras are commonly colour blackness, this optical device actually comes in a wide range of colors. You can opt to color the camera using its standard colors or handpick a unique gear up of colors.
You can even use more than one color to brand your camera multi-colored—that would be so fun!
Accept fun playing with colors! And ever recall, the sky's the limit to your imagination.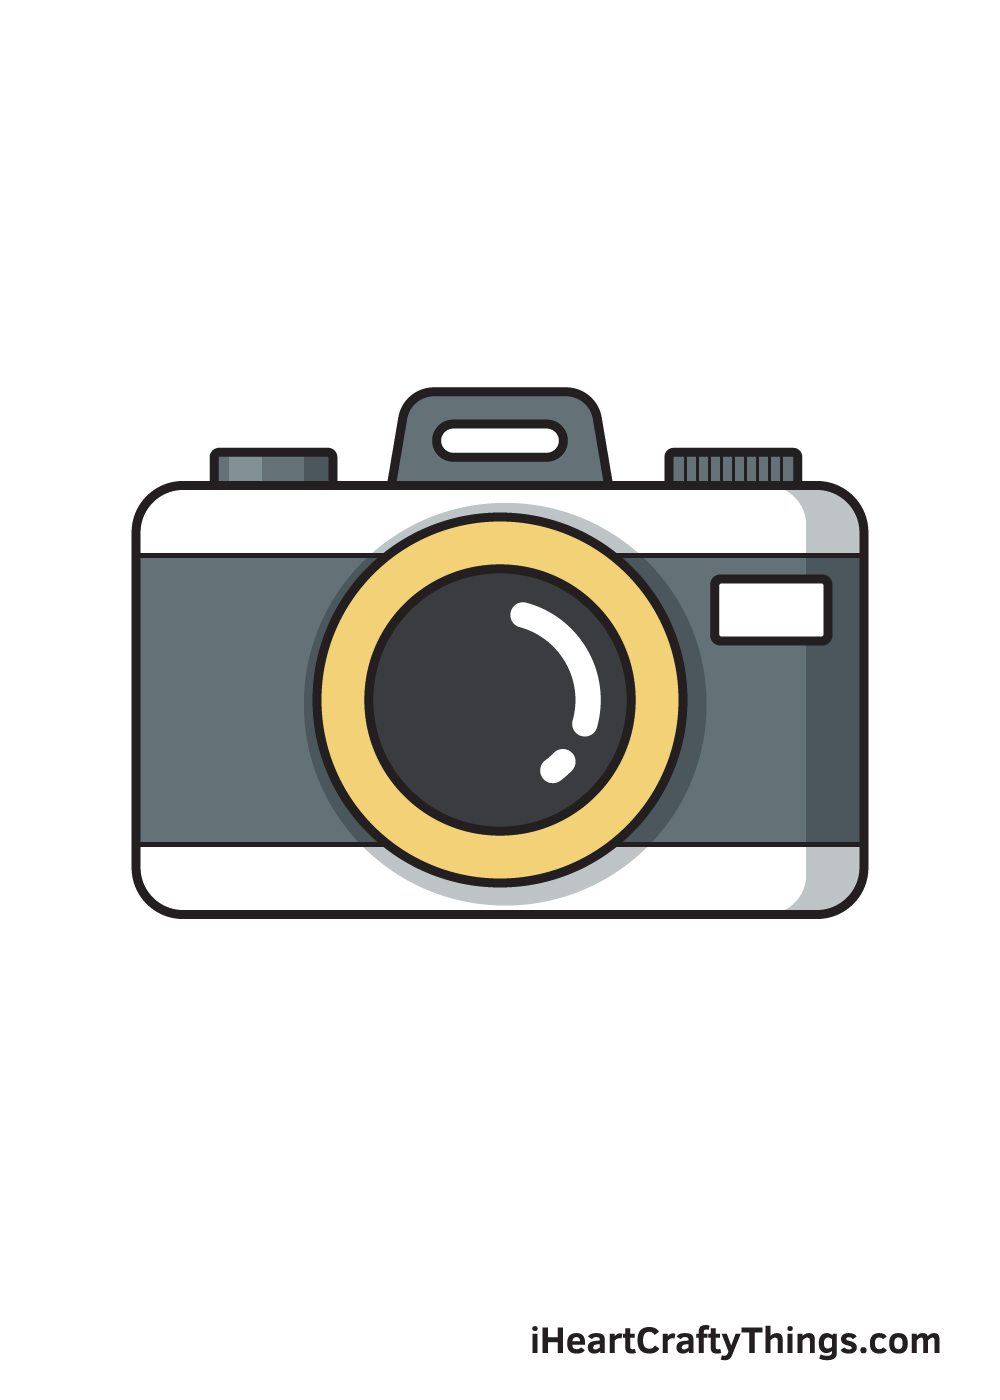
Your Camera Cartoon is Complete!
Hopefully, yous had a good time drawing a photographic camera. One time you've learned how to draw one, perhaps you tin can endeavor cartoon a person with a photographic camera on his or her hand taking a photograph next time?
We are uploading brand-new drawing tutorials on a regular basis, so brand sure to keep checking back then you can continuously learn to draw interesting objects like this.
What would y'all similar to depict next? Permit united states know and we'll exercise our best to create a drawing tutorial for it.
As presently as you finish cartoon and coloring a camera, don't forget to take a photo of your masterpiece!
Afterwards, testify off your artwork by sharing it on our Facebook page and on Pinterest. Don't be embarrassed, we're sure it looks impressive!
We're looking forward to seeing your colorful camera cartoon!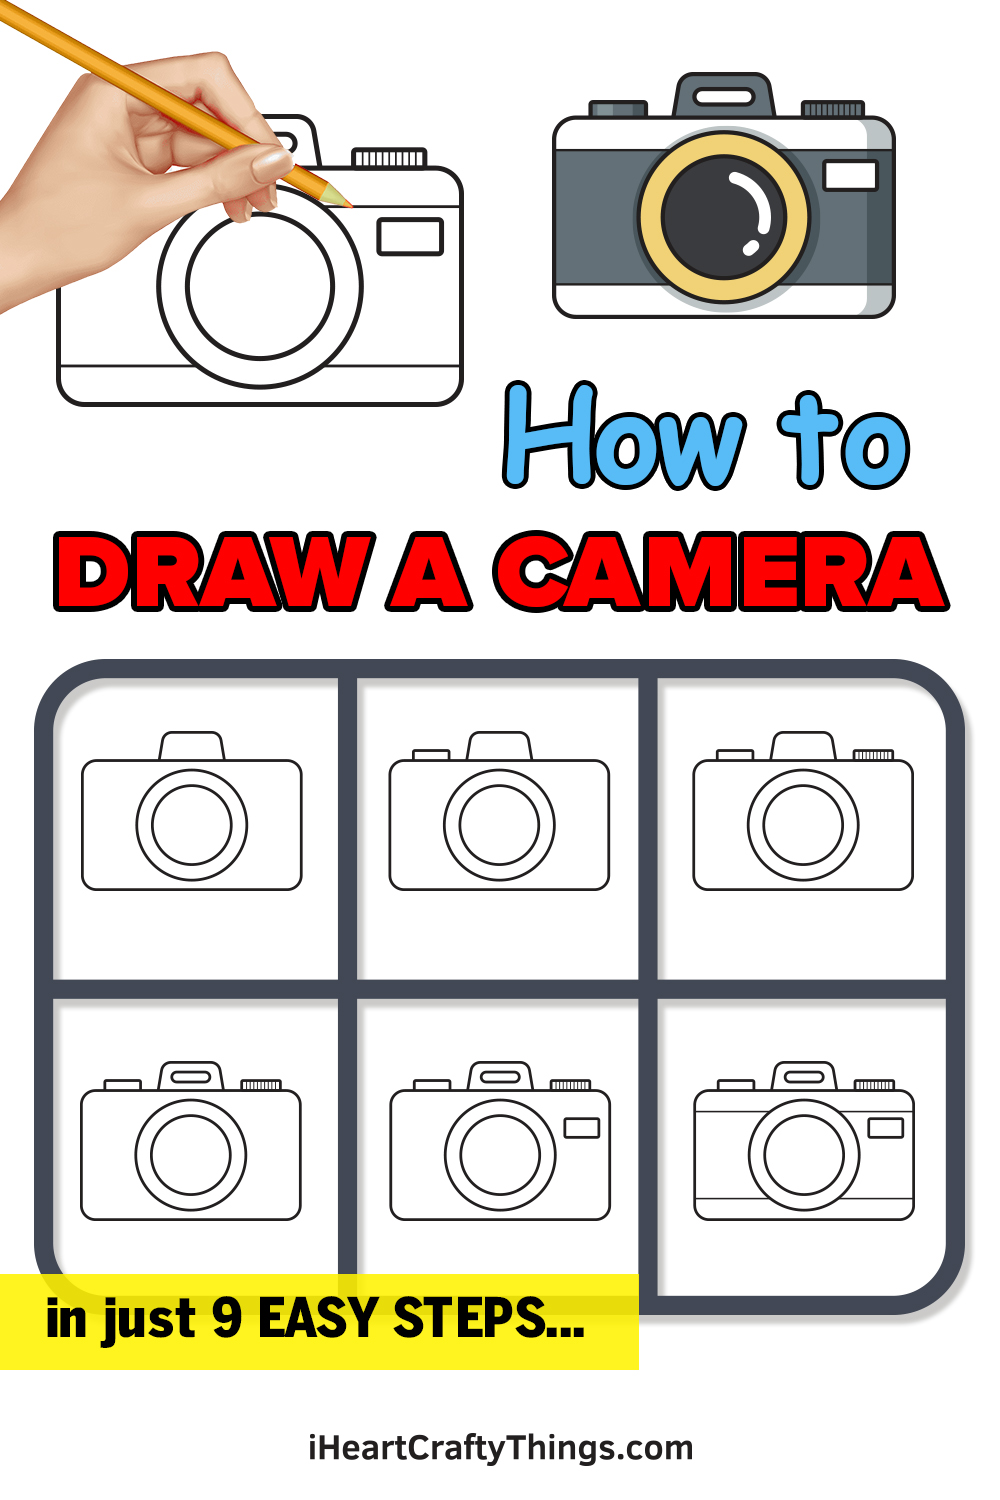
Source: https://iheartcraftythings.com/camera-drawing.html
0 Response to "how to draw a 3d camera"
Post a Comment